Replica Movie Props

Monday, April 27, 2009

More Leg Skinning

I am off work today. Even though I am sick, I still decided to hit the workshop and breathe some dangerous fumes. Just what a medicated sinus infection needs, eh?

Got the sides of the middle leg all cemented up and clamped in place. I thought about cutting a strip that would wrap all the way around from the top of one side to the top of the other bending over the foot pivot point, but I decided to do those parts separately for simplicities sake. This will create a tiny bit of re-work at the end sealing and sanding the seams, but that’s acceptable to me.

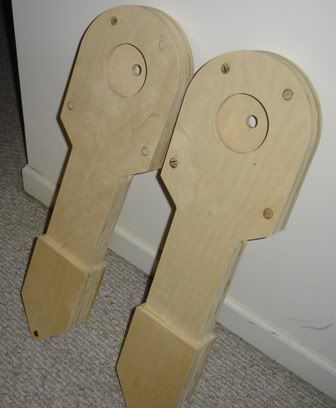
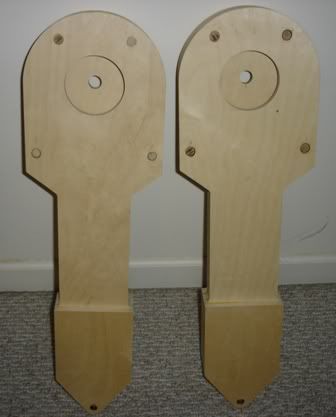
On to the bigger legs while the middle one sets. I decided to start with the front of one of the side legs. I went ahead and bonded up the peg holes. I didn’t really need to, but in the interest of completeness, I figured it couldn’t hurt.


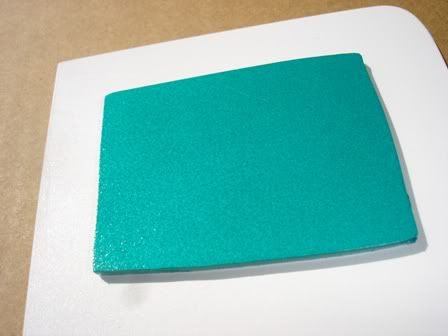
I cut the plastic out (trimming a small rough hole for the shoulder hub-it will be finished up after everything is glued tight,) and test fit it before gluing.


Then I painted on the water based contact cement using a gray-foam brush. You can see the difference between the brushed wood surface and the bare wood surface (after curing for about 30 minutes per instructions on the can.)


Then I clamped it up and so it shall sit in the workshop over night. You can see in the up-close shot that I trimmed the styrene so that there was some overhanging the edge of the leg. I will do this on all my plastic pieces. This way I can trim it up after it sets so I don’t have to be too perfect when cutting the pieces out and fitting them to the legs; a nice time saver producing only a little waste.

Sunday, April 26, 2009

Skinning a leg or two

I got thee 3 legs assembled and sanded. Even got the outer legs routed with 1/8” groove. I also go the smooth handy-board cut, beveled, and glued in place.


Now that all that was finished up, I decided to take a page out of Dan’s book and skin my legs to cut down on dozens and dozens of hours of bondoing and sanding. I decided to start with the third leg to get a little practice. It is smaller, less complicated and the top side will likely be trimmed down so some errors will be able to be dealt with easily.

I am using water based contact cement. After applying the glue I sandwiched the whole thing between some scrap wood and clamped it tight. In a day, I’ll take the clamps off and see what I have.

I used a piece of .020” styrene I have for vacuum forming. Here is laid out.


I cut traced the center lag on the plastic with pencil and used regular scissors to cut it out. I left a bit of material around the edges. That way, I can ensure complete coverage; I’ll trim it later.

I would definately reccomend not using the roller. It made a lot of air bubbles and driping on the sides. I ended up using one of those gray sponge brushes. I will use the sponge brushes for the rest of the leg skinning.


Lastly I clamped it up. I’ll pull it apart tomorrow to see how well it worked.

Tuesday, April 21, 2009

Legs are done, motors have arived.

Got the main legs glued together. Also recieved the motors and belts I just bought. They are 135 watt scooter motors. I have previously bought a single slightly used wheel/axle assembly on ebay. I need to get one more wheel.


Sunday, April 19, 2009

Leg Work

I got a little work done on one of R2's legs today. Admittedly, it's only cleaning up and gluing one of them, but it feels good to actually get something done. I am very close being able to get going on the whole droid. Except ffor feet and detail pieces, all I basically need is a plethora of fasteners and some wood for the frame.

Here's the first leg glued together. All I can say if you do one of these yourself, is clamps, clamps, clamps. I used almost all the clamps I had on this leg. I really wan to get the other legs glued up too, but I have to wait to re-use my clamps.


Sunday, April 12, 2009

Some paint sampling

I finally got around to some paint testing; thanks to better weather. I used Tamiya fine light gray primer, topped with Rust-oleum 7718 Chrome, with a final coat of Dupli-Color Metalcast MC203 Green Anodized. I will clear coat it later to see what happens.

There was a bit of marblizingtoo the textur of the pice, I think I over coated the silver on one of the passes.

Here's one shot in the sun. More pix can be found in this album:


Wednesday, April 8, 2009

Motor Bummer

Well I bought 2 E100 Razor scooter motors from an on-line store. They only sent me one and refunded my for the second sighting 'out of stock for months.' This really bummed me out. I now have to go and buy another 2 motors so they match up. As David L. put it on astromech.net, "I have found that there are several manufacturers for those and you may have some problems getting your droid to run straight using two different motors as one may have a different RPM depending on who made it. All it takes to change the RPM is to add more or reduce the number of windings for the motor. There is no guarantee that the different manufacturers will all use the exact same number of windings."

Wednesday, April 1, 2009

Legs, legs, legs...


I got the CNC cut layered plywod legs today. These things are fantastic. There's a hollow center for running the wires to the foot motors in the two longer legs. It also comes with CNC cut ankle bracelets and shoulder rounds.

The one on the left is all assembled (loosly). The center leg is the short leg that pokes down diretly benieth the body. The leg on the left shows the parts in a jumbled heap.